How to Choose LED Strip Light Connectors?

Choosing the right led strip light connectors is a small decision with major consequences. A connector sits between your lighting plan and its real-world performance. It affects brightness, stability, heat control, and installation time. The wrong choice may cause flickering, loose contacts, or visible dark sections. Sometimes, the failure appears weeks later.

As LED lighting specialist David F. Worthington explains, “A connector should protect the electrical connection, not merely complete it.” This practical view matters when comparing solderless clips, corner connectors, joiners, and waterproof options. Each type serves a different installation condition. A narrow aluminum channel may leave little room for bulky clips. A damp cabinet area requires better sealing. A high-density strip may also demand stronger current handling than a decorative accent strip.

Small details matter.

This guide explores how to choose led strip light connectors with greater confidence. It considers strip width, voltage, polarity, LED density, IP rating, wire gauge, and connection direction. It also examines compatibility between strip profiles and connector designs. Product descriptions can look convincing, yet dimensions may differ by a few millimeters. That difference is enough to create poor contact.

My own practical caution is simple: do not treat connectors as disposable accessories. They are part of the circuit. Still, no selection guide can remove every installation mistake. Connector quality, cutting accuracy, and pressure during assembly remain human variables. Testing each connection before final mounting is slower, but usually wiser.
How to Choose LED Strip Light Connectors?

Identify Your LED Strip Type and Connection Requirements

Choosing an LED strip connector starts with identifying the strip, not the connector. Check the voltage, width, LED layout, and copper-pad spacing. Most strips use 12V or 24V constant-voltage power. Single-color models normally need two conductors. Tunable-white strips often use three. RGB versions usually require four, while RGBW versions may need five.

Count the pads carefully. Then check polarity. A connector rated for 10 mm strips may not fit an 8 mm strip securely. SMD and COB strips can also have different pad shapes and cutting intervals. The U.S. Department of Energy’s 2023 Solid-State Lighting R&D Opportunities report highlights thermal control and system reliability as continuing priorities. That matters here. A loose connector can create resistance, local heating, and visible flicker. I have seen a bright installation fail because the strip was correct, but the clip pressed unevenly.

Connection conditions determine the next choice. For a dry indoor shelf, a simple clip connector may be adequate. Damp areas need suitable sealing and an enclosure compatible with the strip’s protection level. Check the connector’s voltage and current ratings against the full circuit, not only one short section. The International Electrotechnical Commission’s IEC 60529 framework classifies enclosure protection through IP ratings, but an IP-rated strip does not automatically make its connector waterproof. Test the joint before installation.

Data from the U.S. Department of Energy also shows that LED laboratory efficacy can exceed 200 lumens per watt, yet real systems lose performance through heat and poor connections. That difference is easy to overlook. Soldering is less convenient, but it can provide a more stable joint when clips feel loose or the strip is repeatedly flexed.

How to Choose LED Strip Light Connectors?

Identify the LED strip type and the number of electrical paths required before selecting a connector. The chart shows the common minimum conductor count for each strip type.

Connection guide: Single-color strips typically use positive and negative conductors. Tunable-white strips add a separate channel for warm and cool white. RGB and RGBW strips require separate color channels, while addressable strips need power, ground, and a data connection. Always match the connector width, pad layout, voltage, and current rating to the actual strip.

Choose the Connector Style for Your Installation

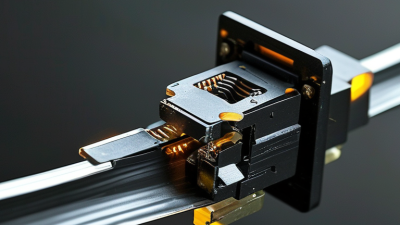
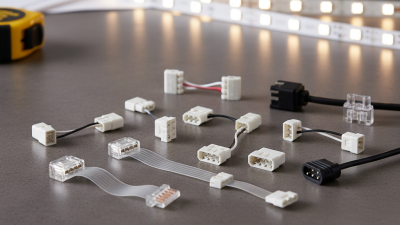
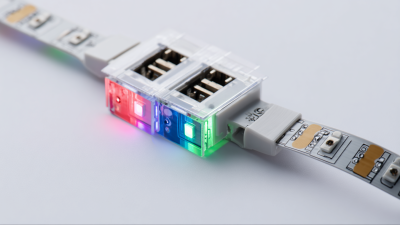
Choosing a connector style starts with the shape of your installation. For a straight run, a clip-on connector can join two cut strip ends without soldering. Check the strip’s width and pin count before buying; a four-pin RGB strip will not fit a two-pin connector. Match the connector to the strip’s voltage and current rating, too. A tight clip can look secure but still make poor contact if the copper pads are misaligned.

Tips: Cut only along marked lines. Open the clip fully, slide the strip beneath its contacts, then close it firmly. Test the lights before attaching the strip to a cabinet or wall. It is a small step, but it can save rework.

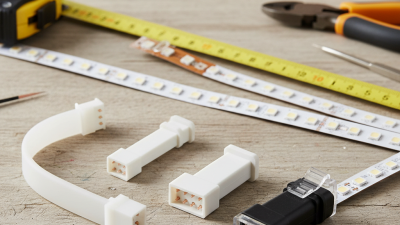
For corners, choose an angled connector or a short flexible lead. A flexible lead is often easier around cabinet edges, where a rigid connector may twist the strip. Use a gapless connector when two sections need to sit close together; use a jumper when you need space between them.

For damp locations, check that the connector and strip are rated for the conditions, and protect exposed contacts as directed. I have found clips convenient, though they can be less forgiving than soldered joints when strips are pulled or bent. Keep the cable slack modest, not stretched.

Match Connector Size, Polarity, and Electrical Specifications

A connector that snaps onto an LED strip is not automatically the right one. Match its internal contact spacing to the strip’s width and copper-pad layout. A two-pad strip usually needs a two-pin connector; RGB and RGBW strips need four and five contacts. Check the printed polarity and voltage, too. Reversed polarity can stop a strip from working, while a connector rated for 12 volts may not suit a 24-volt setup.

Check current capacity before buying. For example, a 5-metre strip rated at 14.4 watts per metre draws 6 amps at 12 volts: 14.4 × 5 ÷ 12. The connector and wire must support at least the calculated load; confirm their ratings on the product specifications.

The U.S. Department of Energy’s Energy Saver guidance says LEDs use at least 75% less energy than incandescent lighting, but efficiency does not protect undersized contacts from heating. For outdoor strips, choose a connector compatible with the strip’s coating and sealing method. IEC 60529 classifies enclosure protection by IP rating; a connector joint can compromise that protection if it is left exposed.

I still recheck pad alignment by eye. It is easy to miss.

Check Materials, Protection Ratings, and Installation Conditions

Connector materials affect both fit and long-term reliability. Look for firm copper contacts that grip the strip pads evenly, with a housing that resists cracking when pressed closed. Thin, loose contacts can cause flickering or warm spots. Small details matter. Match the connector to the strip’s width, number of contacts, and voltage; a four-contact RGB strip needs a different connector from a single-color strip. Check polarity marks before connecting, since reversed alignment may prevent the lights from working.

Protection ratings should suit the actual location, not just the product label. A dry bedroom usually needs less sealing than a damp patio edge or a strip near a sink. For exposed areas, choose connectors with an appropriate IP rating and compatible seals. Dust or moisture can still enter if the cable jacket sits unevenly. Fit is important. Installation conditions also matter: leave enough room to close the latch without crushing the strip, and keep the joint away from standing water or sharp bends. I’ve found that testing a short section before mounting saves rework, though it is easy to skip when the layout looks straightforward. Test before sealing. Check for steady light, then gently tug each cable to confirm the connection stays secure.

How to Choose LED Strip Light Connectors? - Check Materials, Protection Ratings, and Installation Conditions
Check Point What to Verify Selection Guidance Installation Notes
Strip Width and Contact Layout Match the connector’s supported strip width and contact spacing to the LED strip’s printed specifications. Choose a connector made for the exact strip width and contact-pad arrangement. Common strip widths vary, so do not select by appearance alone. Check that the strip sits flat and that the connector contacts align with the copper pads before closing or securing it.
Number of Conductors Confirm the number and function of the strip’s contacts. Single-color strips commonly use 2 contacts; RGB strips commonly use 4, and RGBW strips commonly use 5. Other layouts exist, so verify the strip markings and wiring diagram. Align polarity and channel labels correctly. Reversed or mismatched connections can prevent operation or cause damage.
Voltage and Electrical Rating Check the strip voltage and the connector’s rated voltage and current. The connector must be suitable for the strip’s supply voltage and expected current. Follow the connector and strip manufacturers’ ratings rather than relying on a general rule. For longer or higher-load runs, consider voltage drop and wiring layout. Turn off power before making connections.
Contact and Housing Materials Review the conductive contact material, plating, and housing material. Conductive copper-alloy contacts are commonly used. Tin-plated contacts can help resist surface oxidation; plastic housings are often made from materials such as polycarbonate or polyamide. Material names alone do not establish suitability for every environment. Check temperature limits, corrosion resistance, and product specifications for the intended location.
Protection Rating Check the connector’s IP rating and the conditions under which that rating applies. IP ratings describe protection against solid objects and water under specified test conditions. An IP-rated connector may require a particular seal, cover, cable, or installation method to achieve its stated protection. For outdoor or damp areas, use a connector rated for the exposure and install it exactly as specified. The rating of the connector does not automatically apply to the entire LED strip assembly.
Indoor, Outdoor, or Damp Location Identify likely exposure to moisture, dust, cleaning, sunlight, and temperature changes. Use an unsealed connector only where its protection level is appropriate. For exposed locations, choose a suitably sealed connection system compatible with the strip and surrounding installation. Keep connections away from standing water where possible. Protect cable entries and cut ends using the sealing method specified for the system.
Connector Style Decide whether a clip-on, soldered, wire-to-strip, or strip-to-strip connection is needed. Clip-on connectors can simplify installation when compatible. Soldered joints can provide a direct connection but require suitable tools and workmanship. Select the style for the connection layout and environment. Do not bend or pull the strip at the connection. Provide strain relief so movement or cable weight does not stress the contact area.
Strip Type and Cut Position Check whether the strip is single-color, tunable white, RGB, RGBW, or another type, and locate its marked cut points. Use a connector designed for the strip type and contact arrangement. Cut only at the marked cut lines to preserve the intended contact pads. After cutting, inspect the pads for damage and remove debris. Follow any instructions for preparing or exposing the contacts before connection.
Installation Space and Bend Radius Measure available clearance and consider corners, channels, and nearby surfaces. Choose a connector with dimensions that fit the installation and allow access for closing, sealing, or inspection. Avoid sharp folds and excessive bending near the connector. Use a suitable corner or extension connection where the strip’s design requires it.
Final Connection Check Confirm secure contact, correct polarity, and compatibility with the power supply and controller. Use the connector’s installation instructions and verify that all stated electrical and environmental requirements are met. Test the strip before final mounting or sealing. Disconnect power before adjustments, and check for loose connections or abnormal heating during operation.

Test the Connection and Confirm Reliable Performance

After choosing a connector that matches the strip’s width, voltage, and pin layout, test the connection before installation. Switch off power, seat the copper pads fully, then gently tug each wire. A loose contact can flicker or heat under load. Check the joint after several minutes of operation; look for dimming, intermittent light, or warmth around the contact. Warmth is a warning, not a pass.

Tips: DOE guidance on LED lifetime testing notes that reliable projections depend on measured operating data, including at least 6,000 hours of LM-80 data for LED packages. That does not certify a connector, but it is a useful reminder: brief bench tests cannot prove long-term reliability. For a practical check, run the strip at its intended voltage and brightness, inspect the joint, and repeat after bending the cable gently. I have seen a connection pass a quick light-up test, then fail when the wire shifted.

Record the connector type, strip voltage, test duration, and any visible changes. If the light flickers when the cable moves, reseat the contacts or use a compatible soldered connection. Do not assume a bright first test means the joint is dependable.